![staffCircle_logo_trans3-1.png]](https://knowledge.staffcircle.info/hs-fs/hubfs/staffCircle_logo_trans3-1.png?height=50&name=staffCircle_logo_trans3-1.png)
Overview
This guide walks you through the three stages required to connect a Microsoft Copilot Studio agent to the StaffCircle platform using the Model Context Protocol (MCP).
1. Create and configure a Copilot Studio agent with the StaffCircle MCP Tool.
2. Publish the agent and deploy it to Microsoft Teams within your organisation.
3. Authenticate via the Connection Manager so users can access their StaffCircle data.
This guide is intended for IT administrators and Power Platform makers
Prerequisites
Before you begin, ensure the following are in place:
|
Requirement |
Details |
|
Microsoft 365 Account |
Access to Copilot Studio (Power Platform environment) |
|
StaffCircle Account |
Admin permissions sufficient to authorise integrations |
|
MCP Server URL (UK) |
https://mcp.scp.staffcircle.net/mcp |
|
MCP Server URL (US) |
https://mcp.scp.staffcircle.us/mcp |
|
💡 Authentication: OAuth 2.0 with Dynamic Discovery is used — you do not need to supply a Client ID or Client Secret manually. The server's well-known endpoint handles this automatically. |
Section 1: Create a Copilot Studio Agent with the StaffCircle MCP Tool
1.1 Sign in to Copilot Studio
|
1 |
Navigate to Copilot Studio |
1.2 Create a New Agent
|
2 |
Create a new agent |
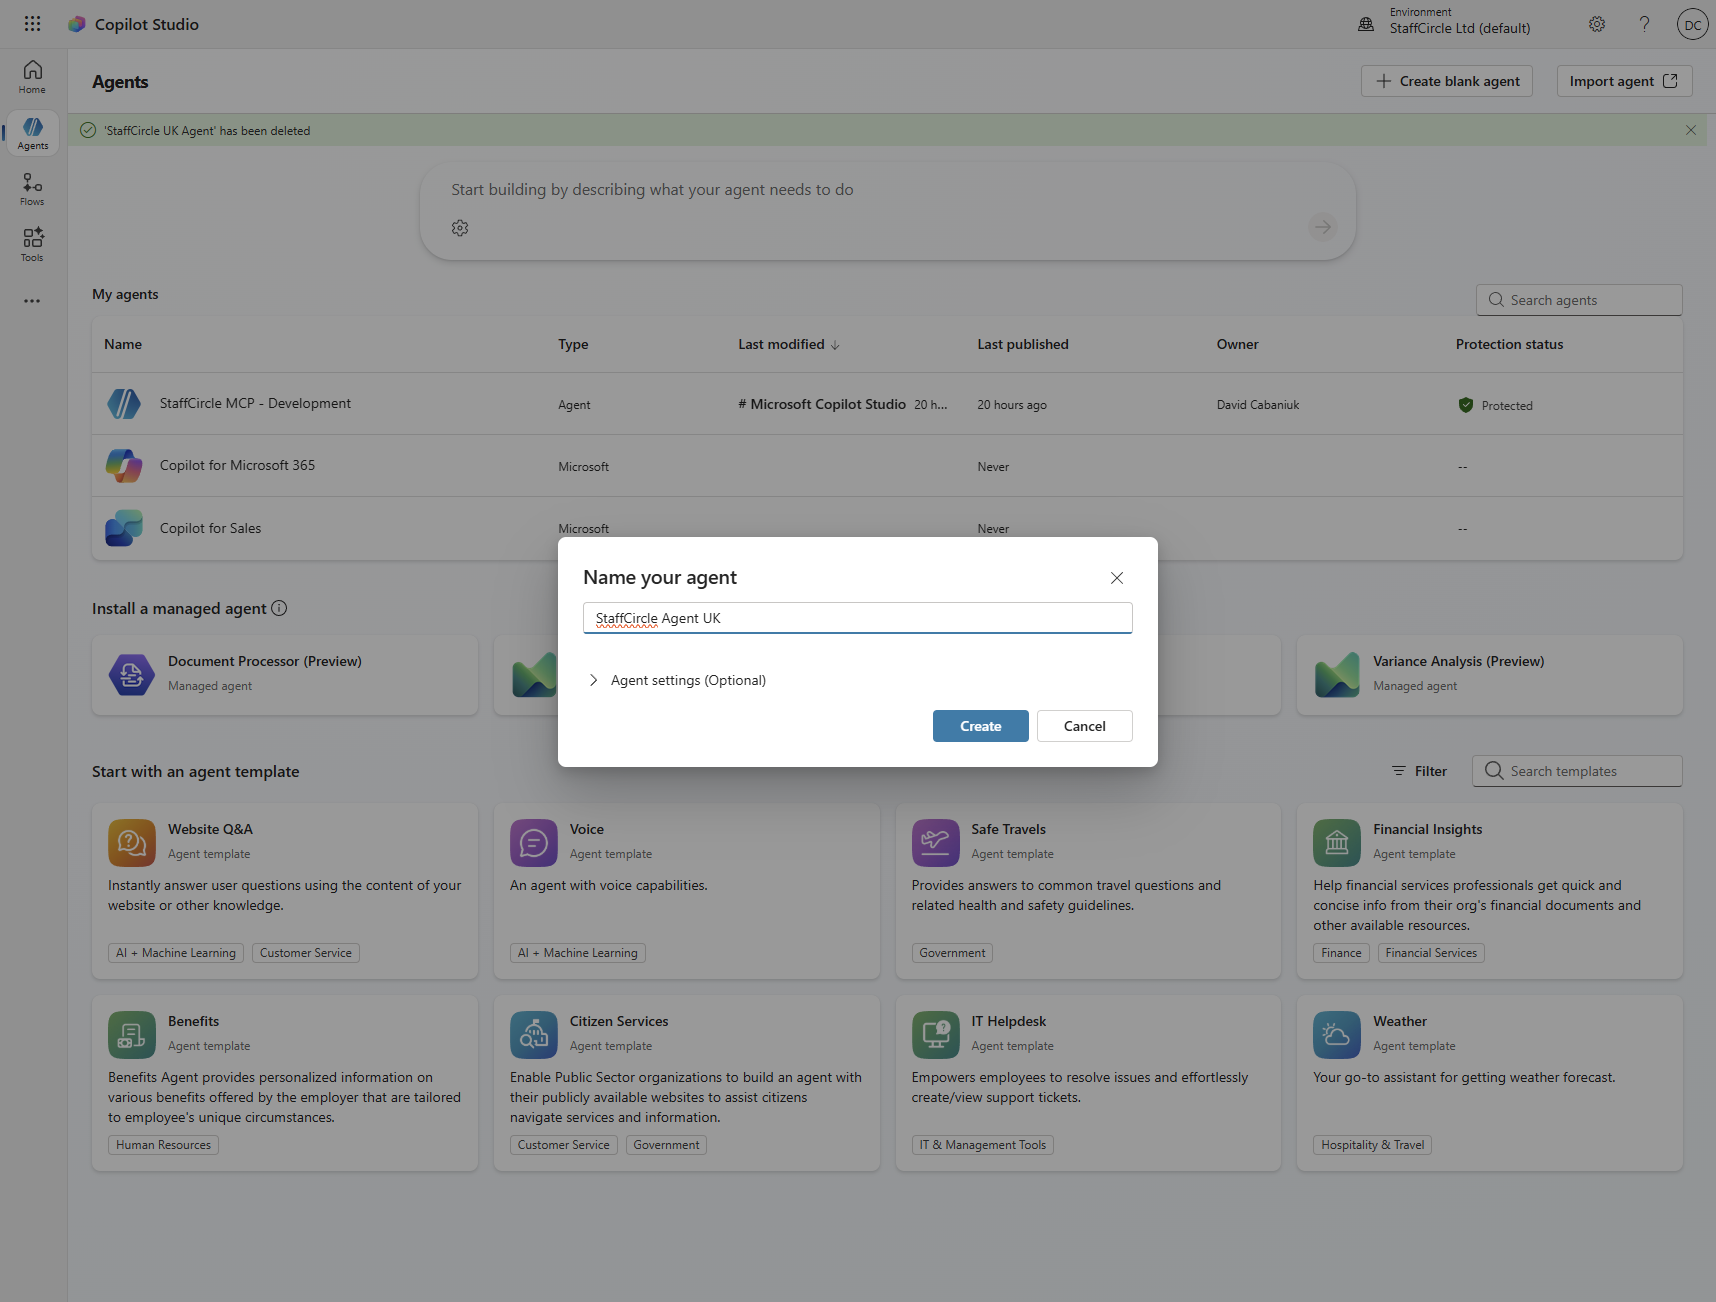
Figure 1 – Creating a new agent in Copilot Studio
1.3 Add the StaffCircle MCP Tool
|
3 |
Open the Tools section |
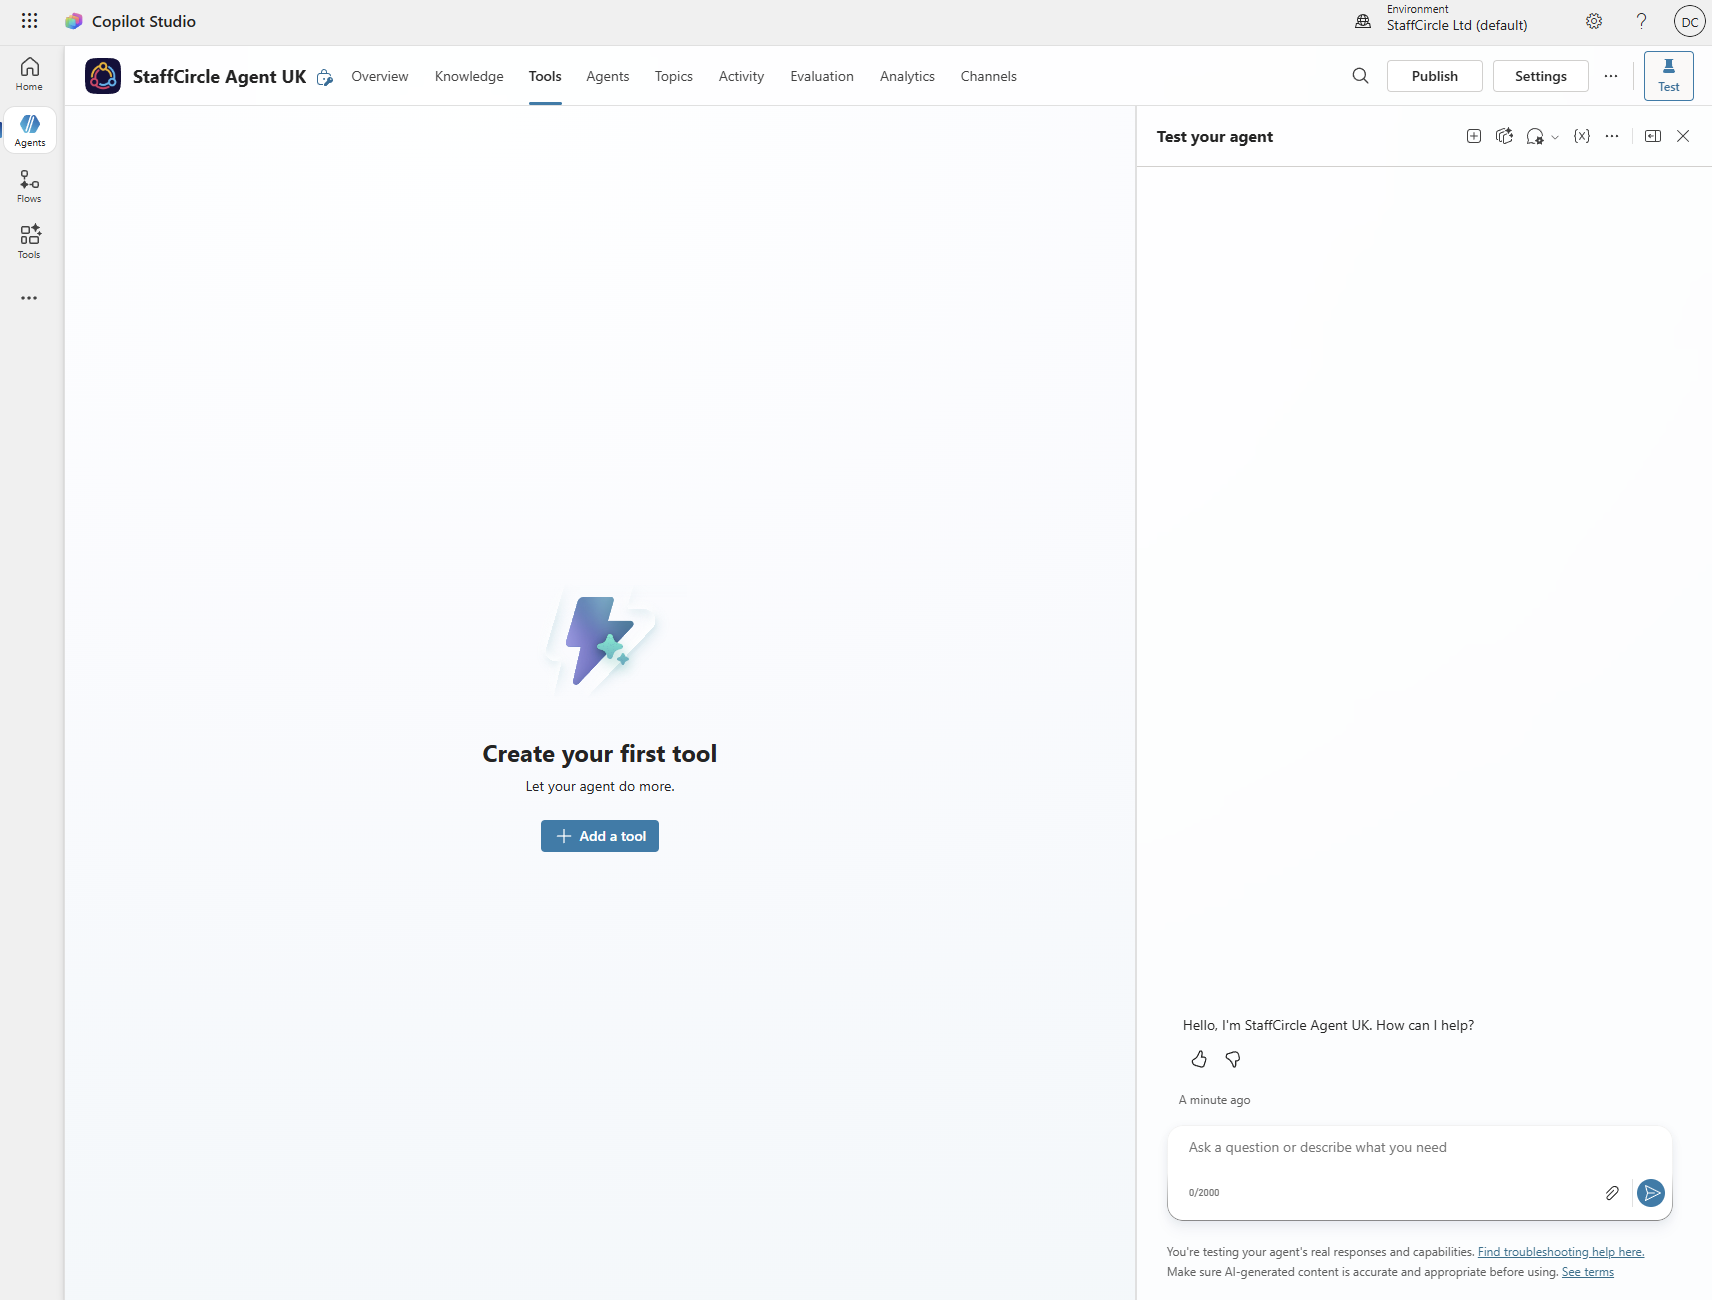
Figure 2 – The Tools tab inside your agent
|
4 |
Select "Model Context Protocol" |
|
5 |
Enter the server details |
|
6 |
Set the authentication type |
|
7 |
Save and connect the MCP tool |
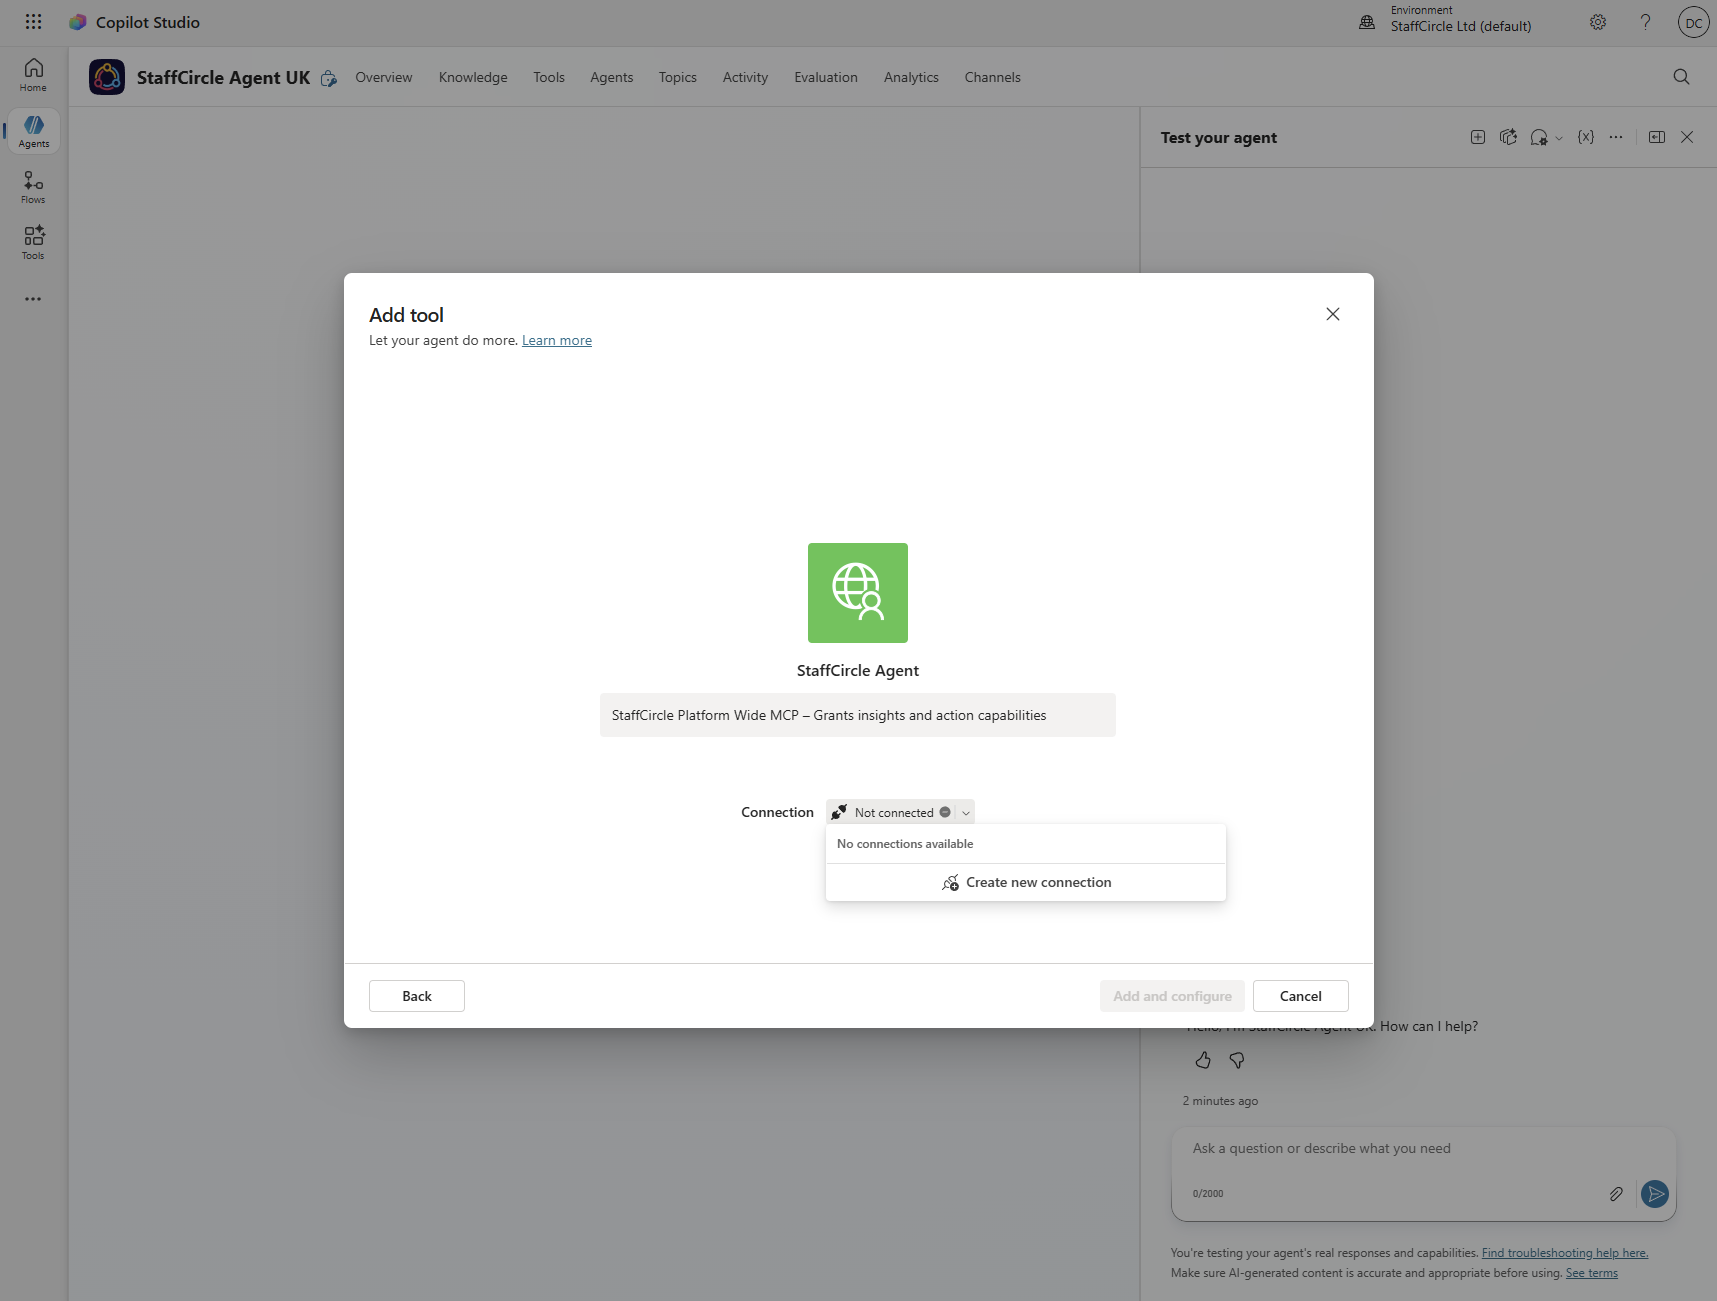
Figure 3 – Creating a new connection
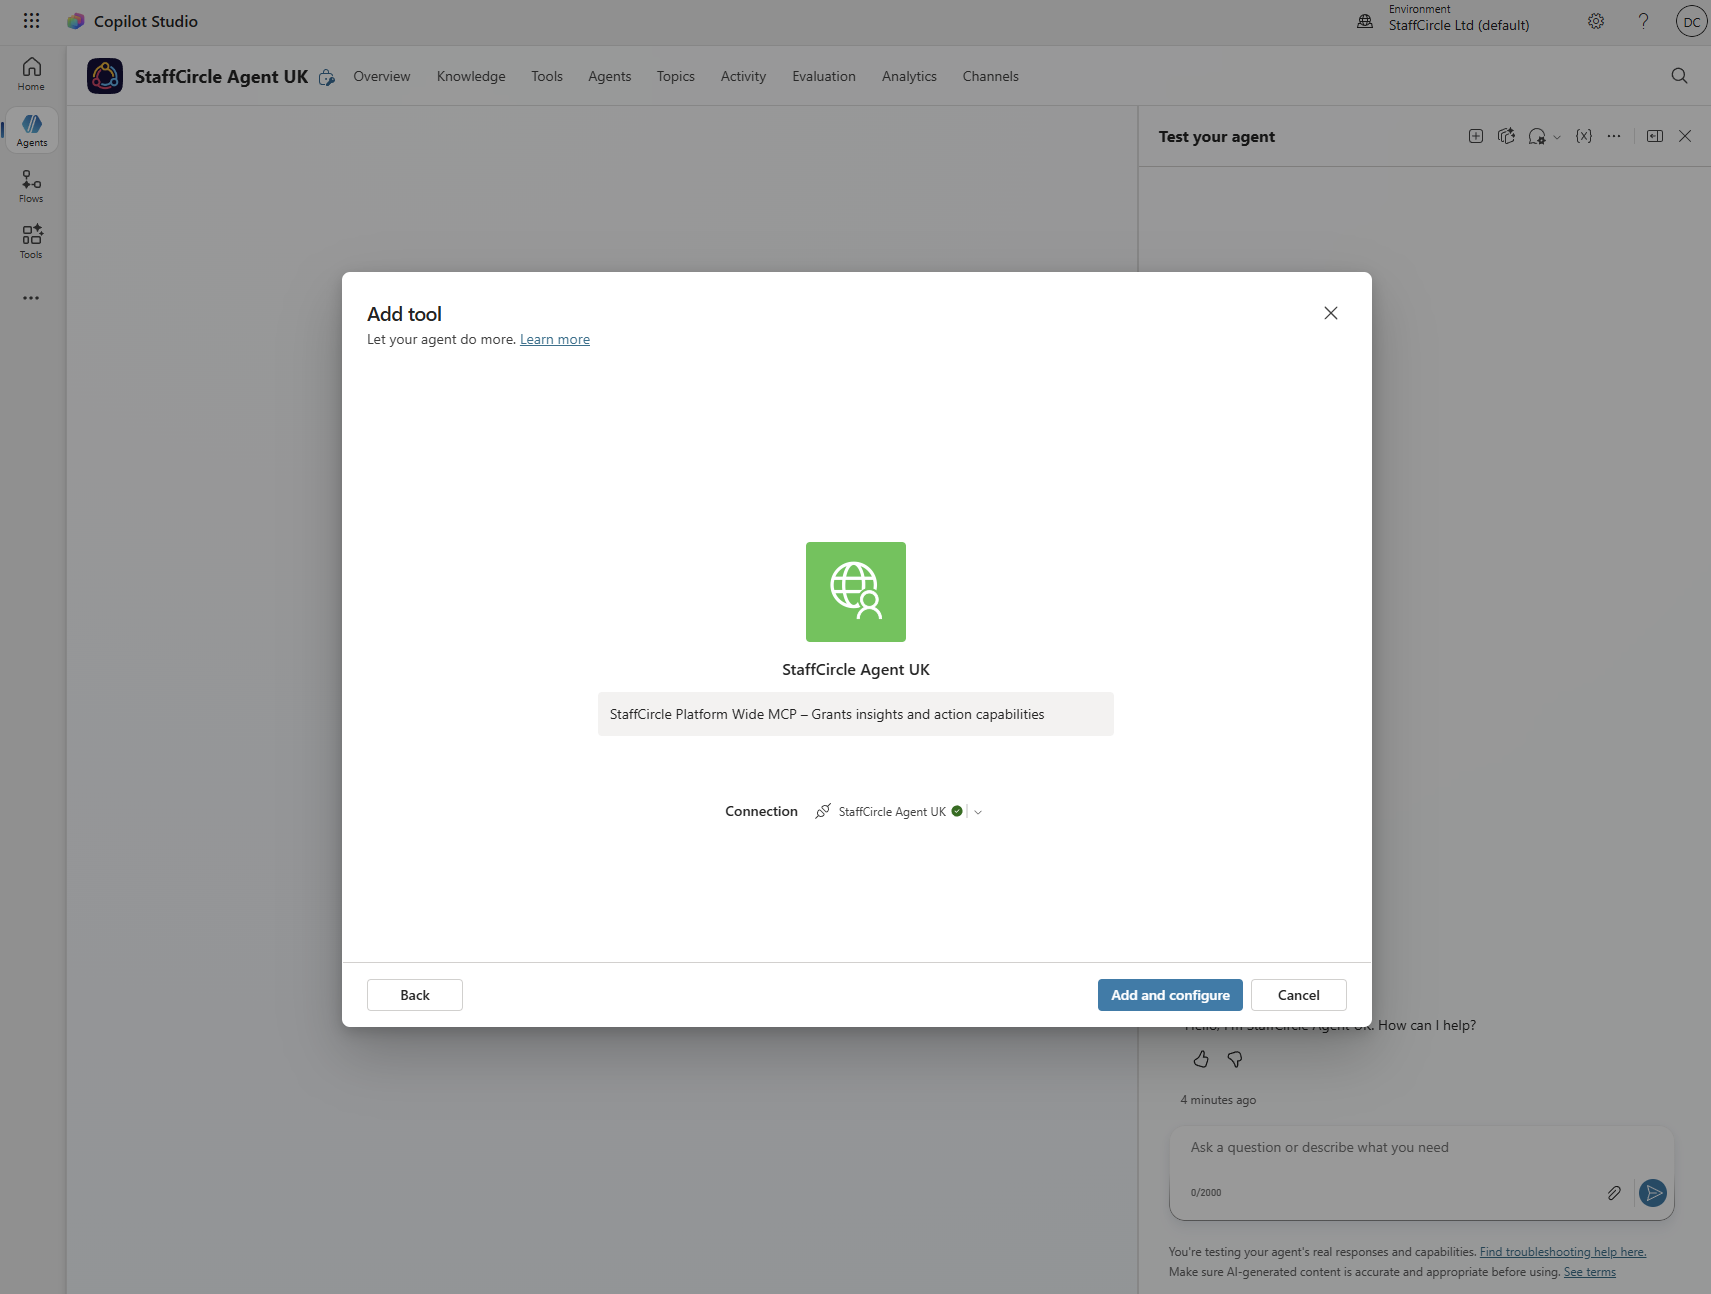
Figure 4 – Clicking "Add and Configure" to finalise the tool
Section 2: Publish the Agent and Deploy to Microsoft Teams
2.1 Add the Microsoft Teams Channel
|
1 |
Navigate to Channels |
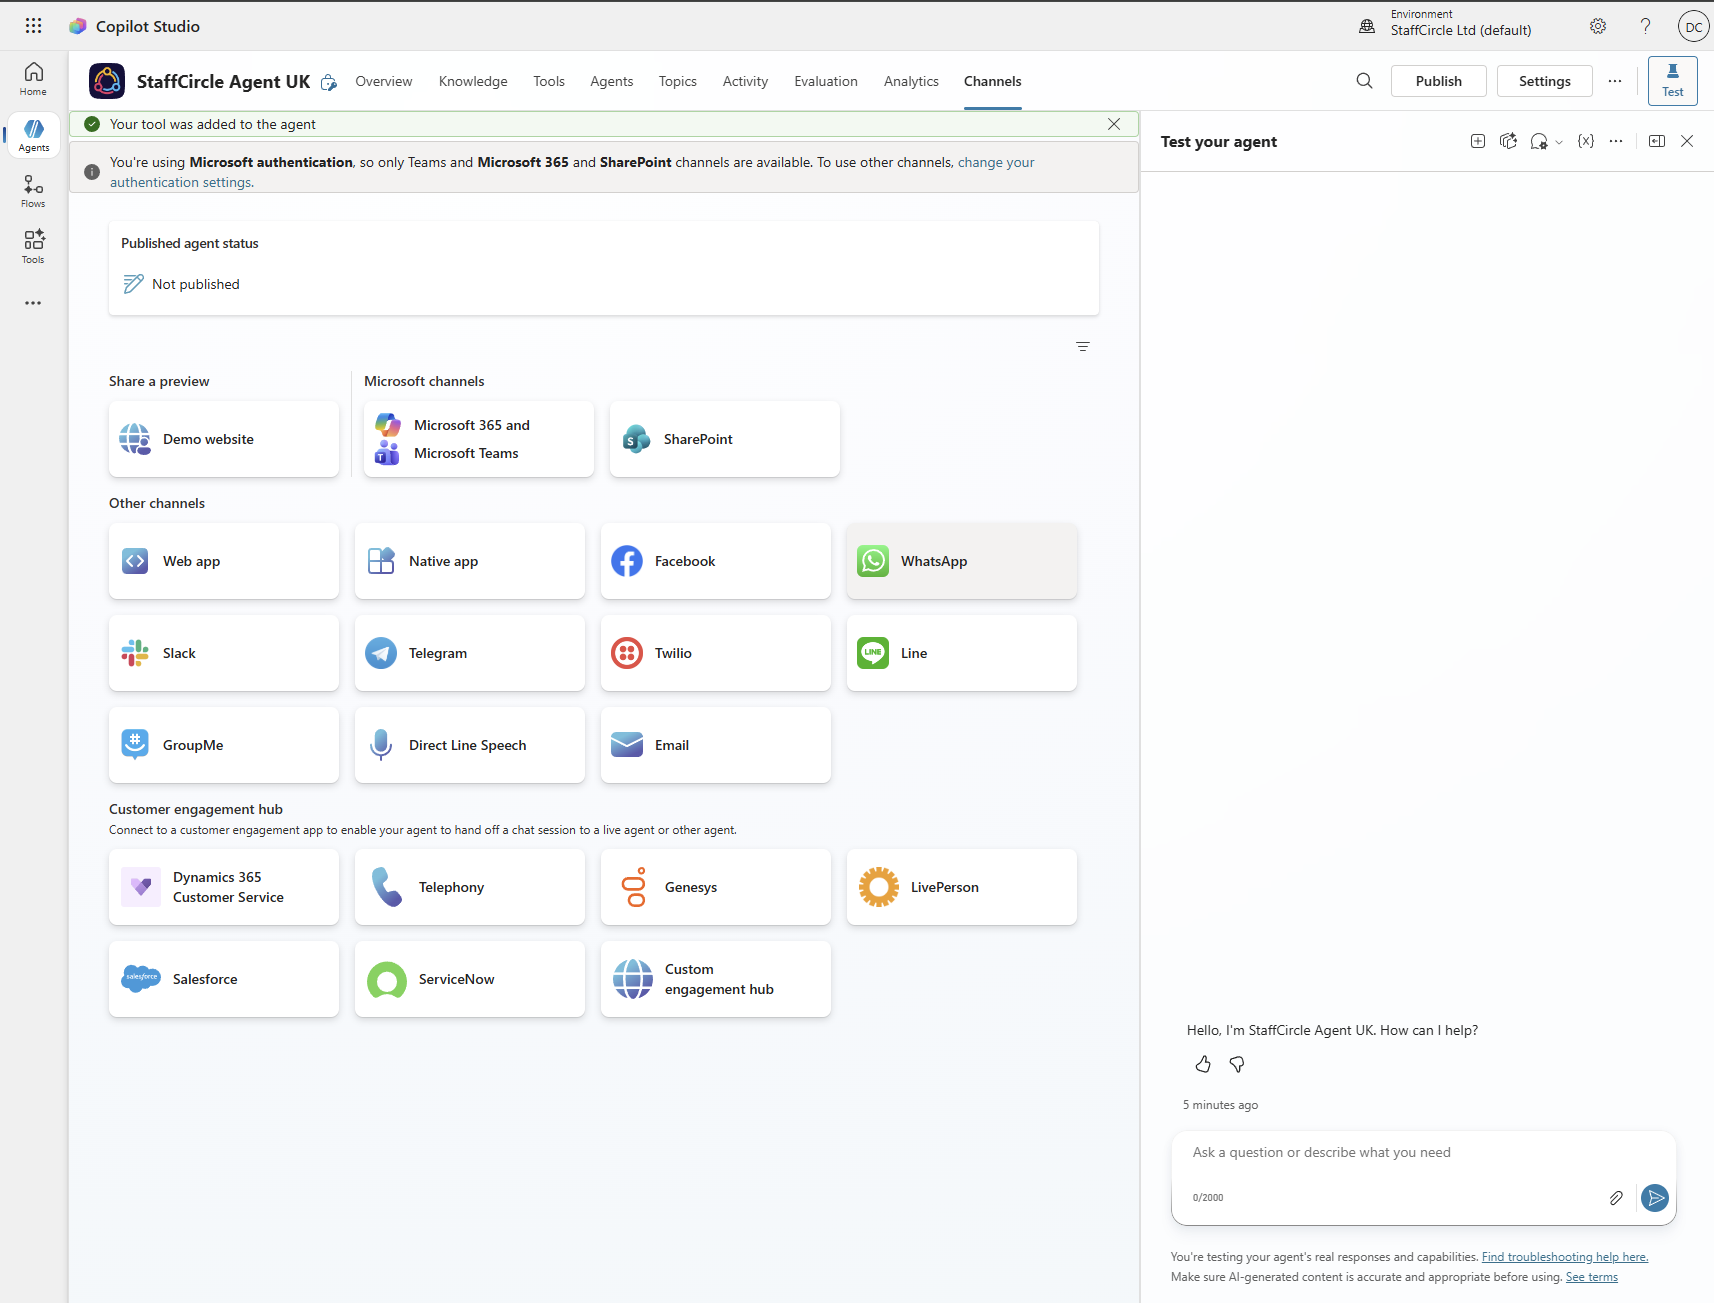
Figure 5 – The Channels page
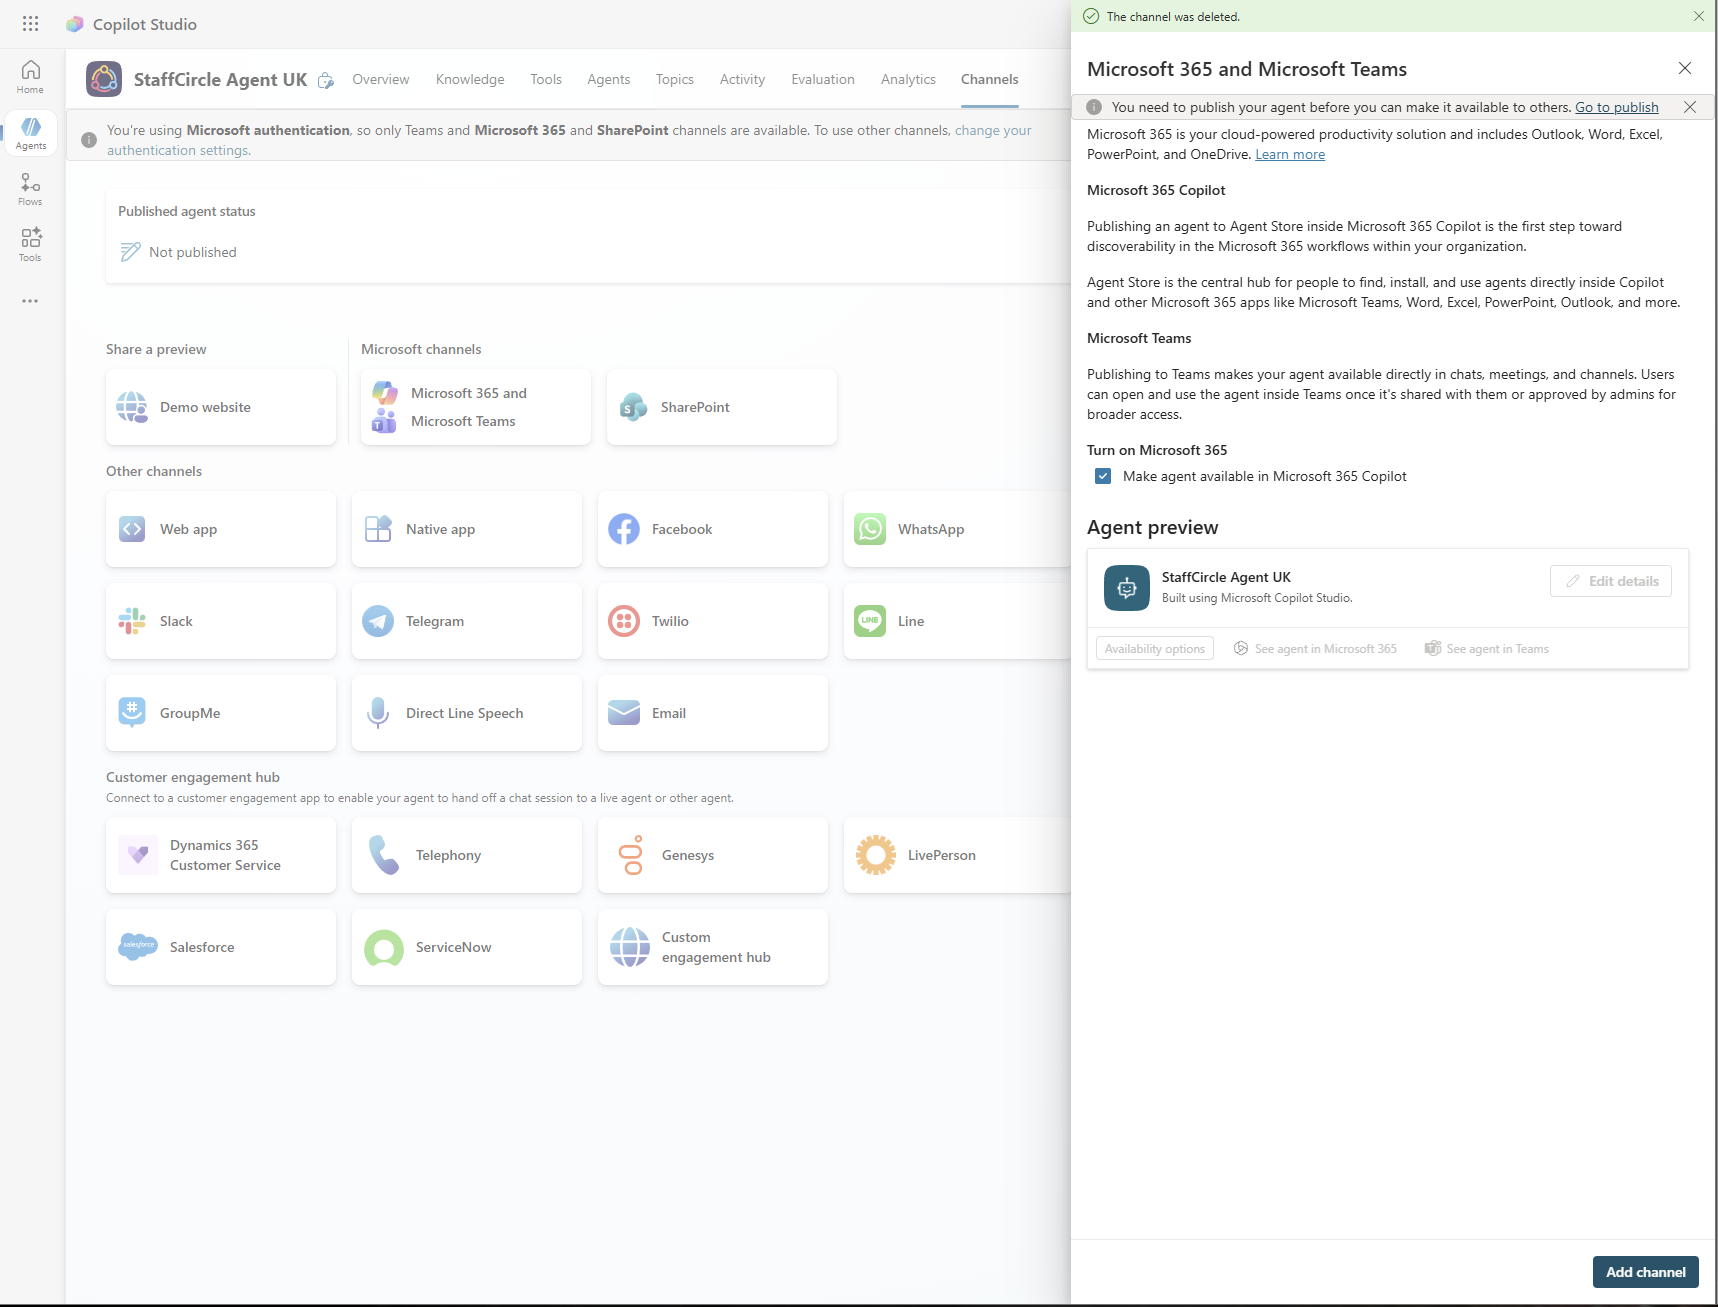
Figure 6 – Selecting Microsoft Teams as the channel
2.2 Publish the Agent
|
2 |
Publish your agent |
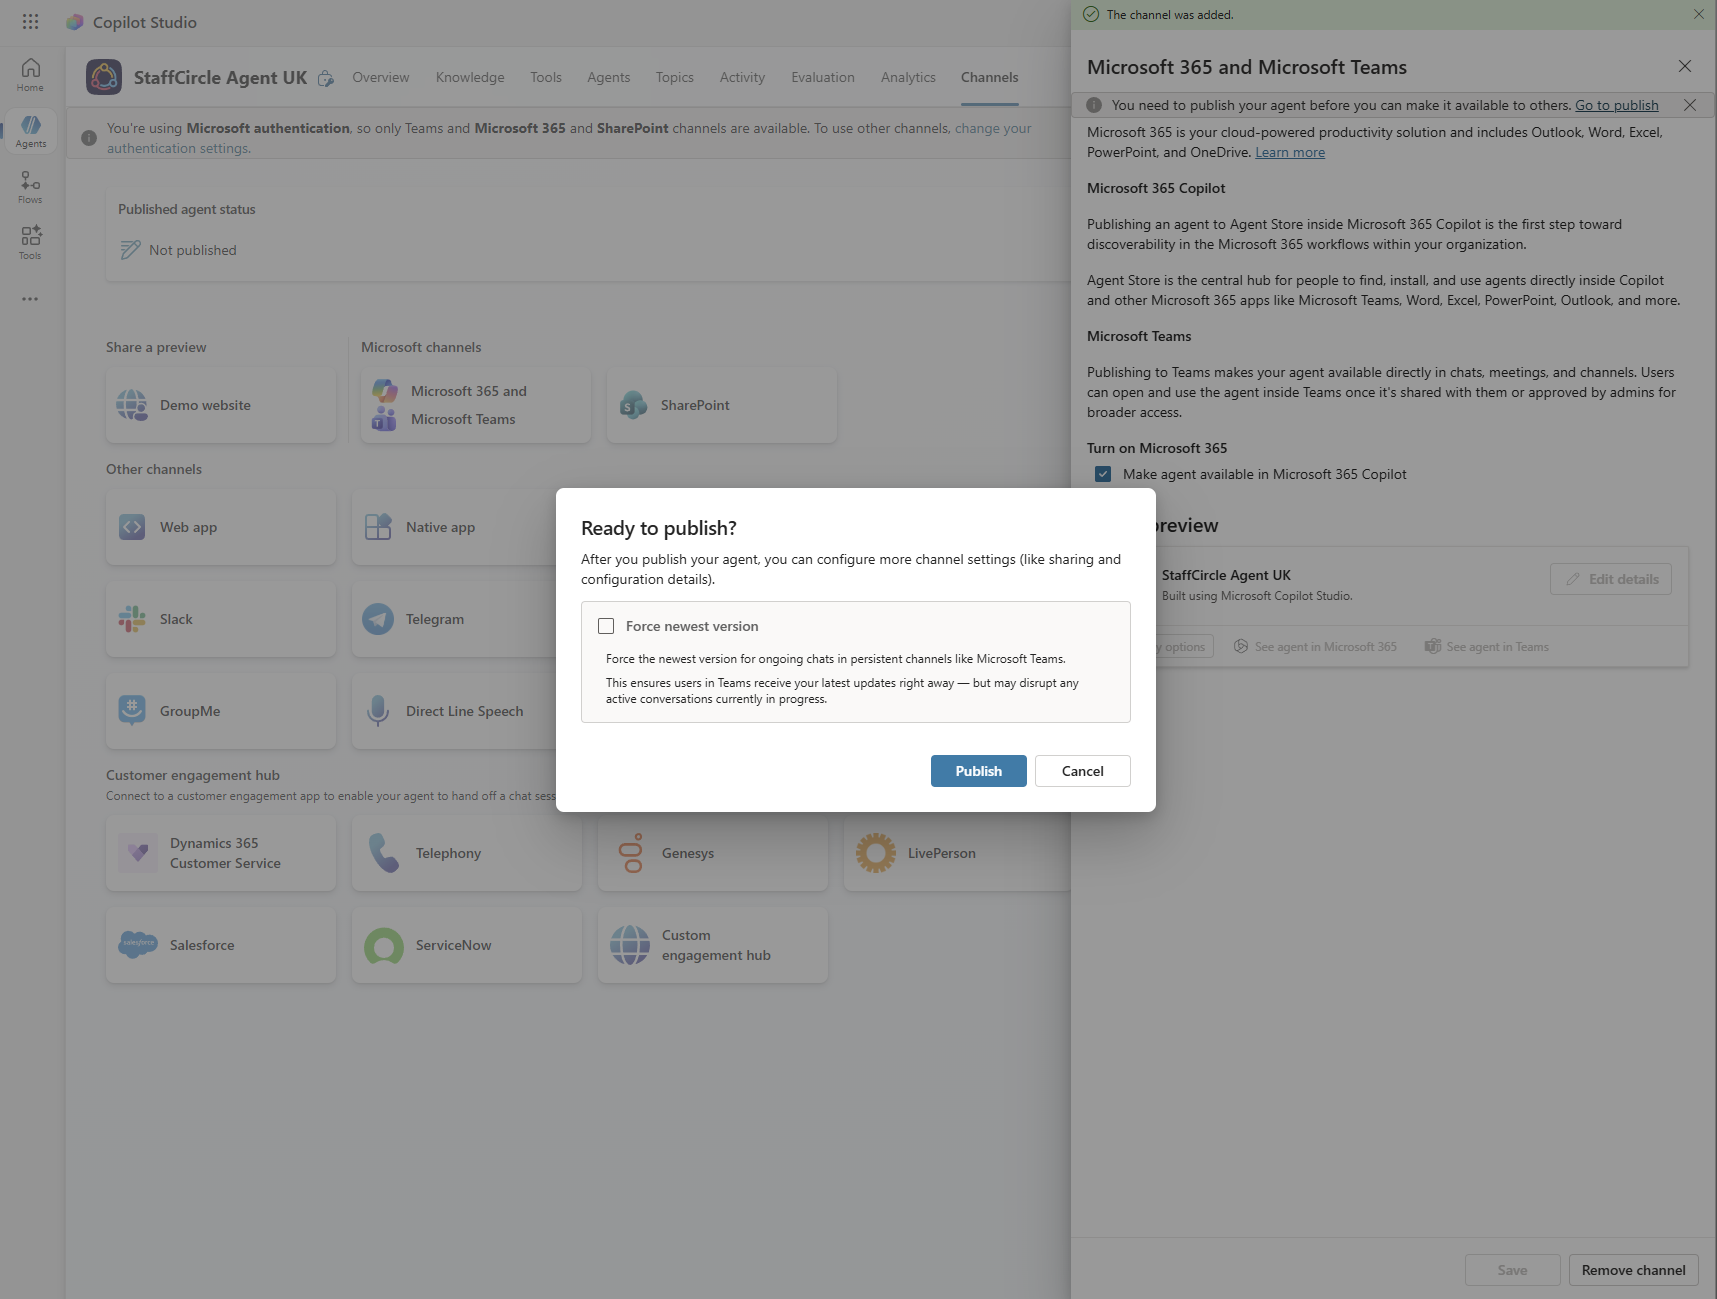
Figure 7 – Publishing the agent
2.3 Distribute to Your Organisation
|
3 |
Make the agent available to your organisation |
|
4 |
Approve the app in the Teams Admin Centre |
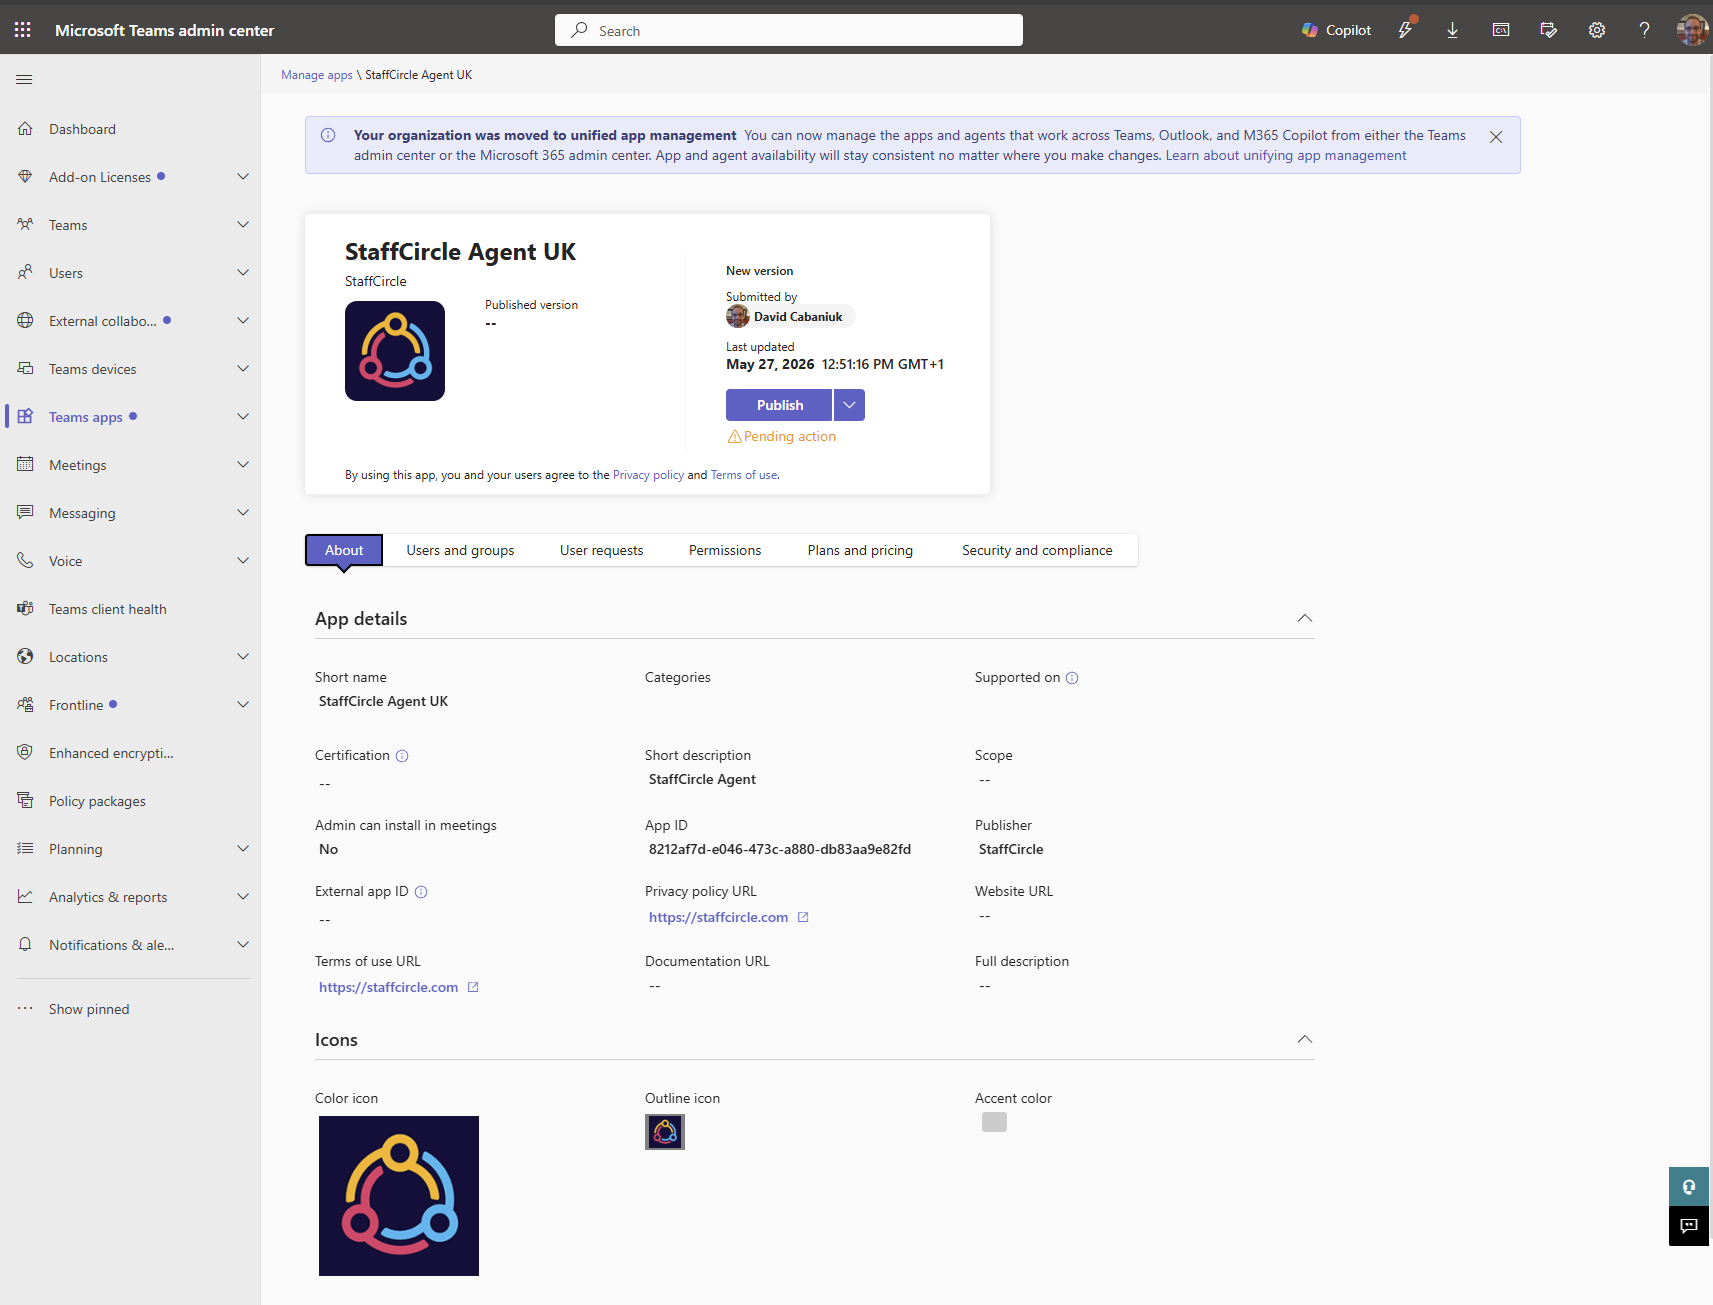
Figure 8 – Approving the app in the Teams Admin Centre
|
5 |
Assign the app to users or groups |
|
6 |
User installs the app in Microsoft Teams |
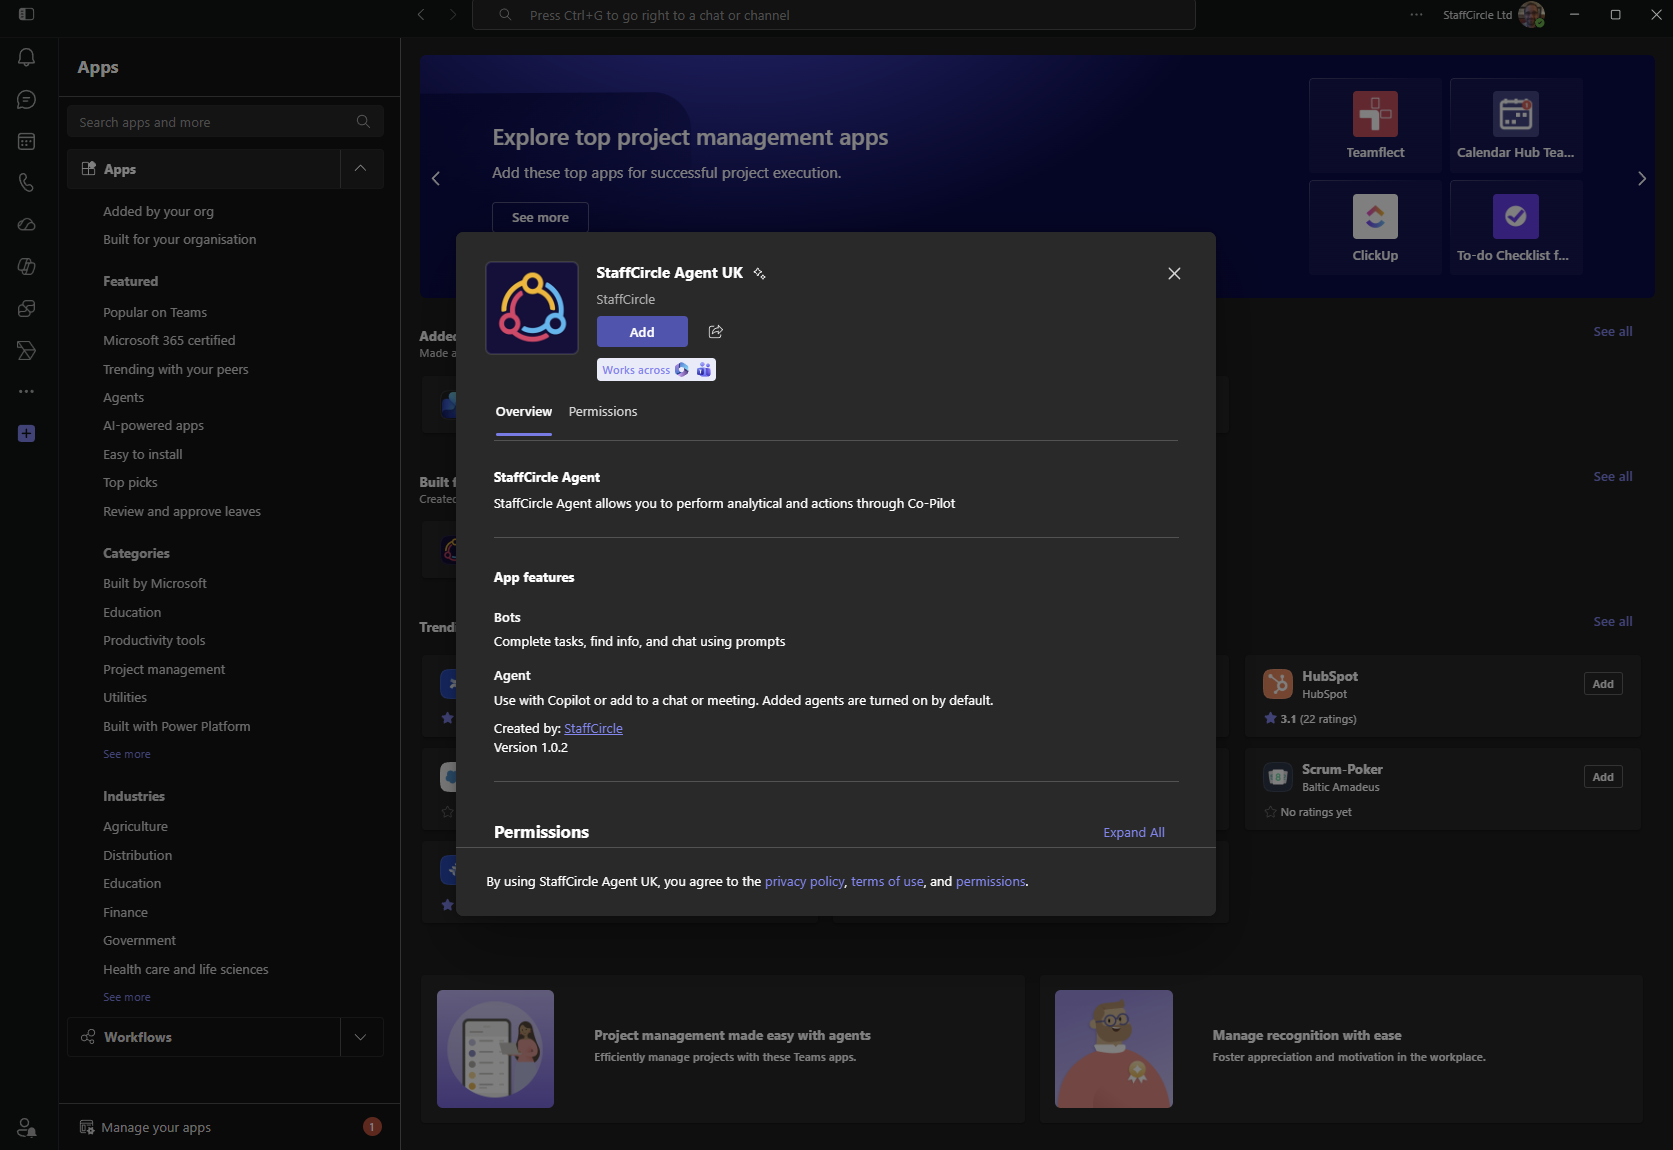
Figure 9 – The StaffCircle app in the Teams app store
|
⏱ Please note: Publishing changes in Copilot Studio and the Teams Admin Centre can take up to 24 hours to fully propagate and appear in the Teams app store for all users. |
Section 3: Authenticating via the Connection Manager
Each user must authenticate their own StaffCircle credentials before the agent can access their personal data. This is done through the Connection Manager, which is triggered automatically the first time a user messages the agent.
3.1 First-Time Authentication in Teams
|
1 |
Open the StaffCircle Agent in Teams |
|
2 |
Send a message to trigger the connection prompt |
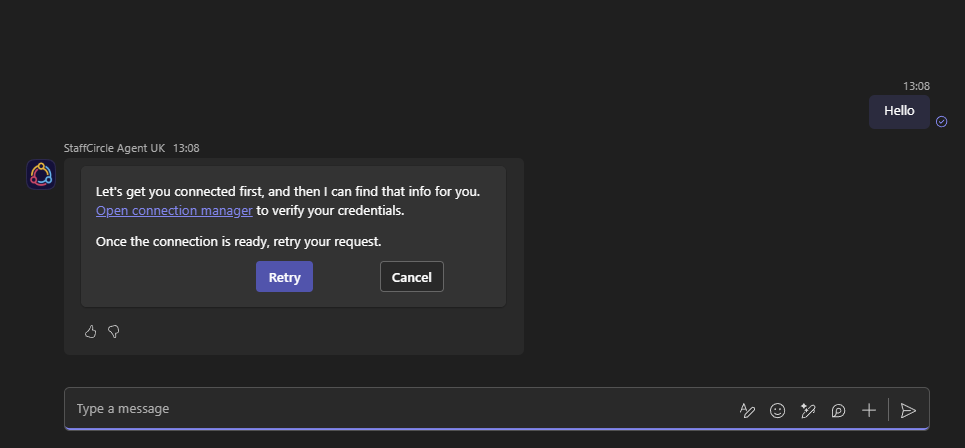
Figure 10 – The connection prompt appears in the chat
|
3 |
Open the Connection Manager |
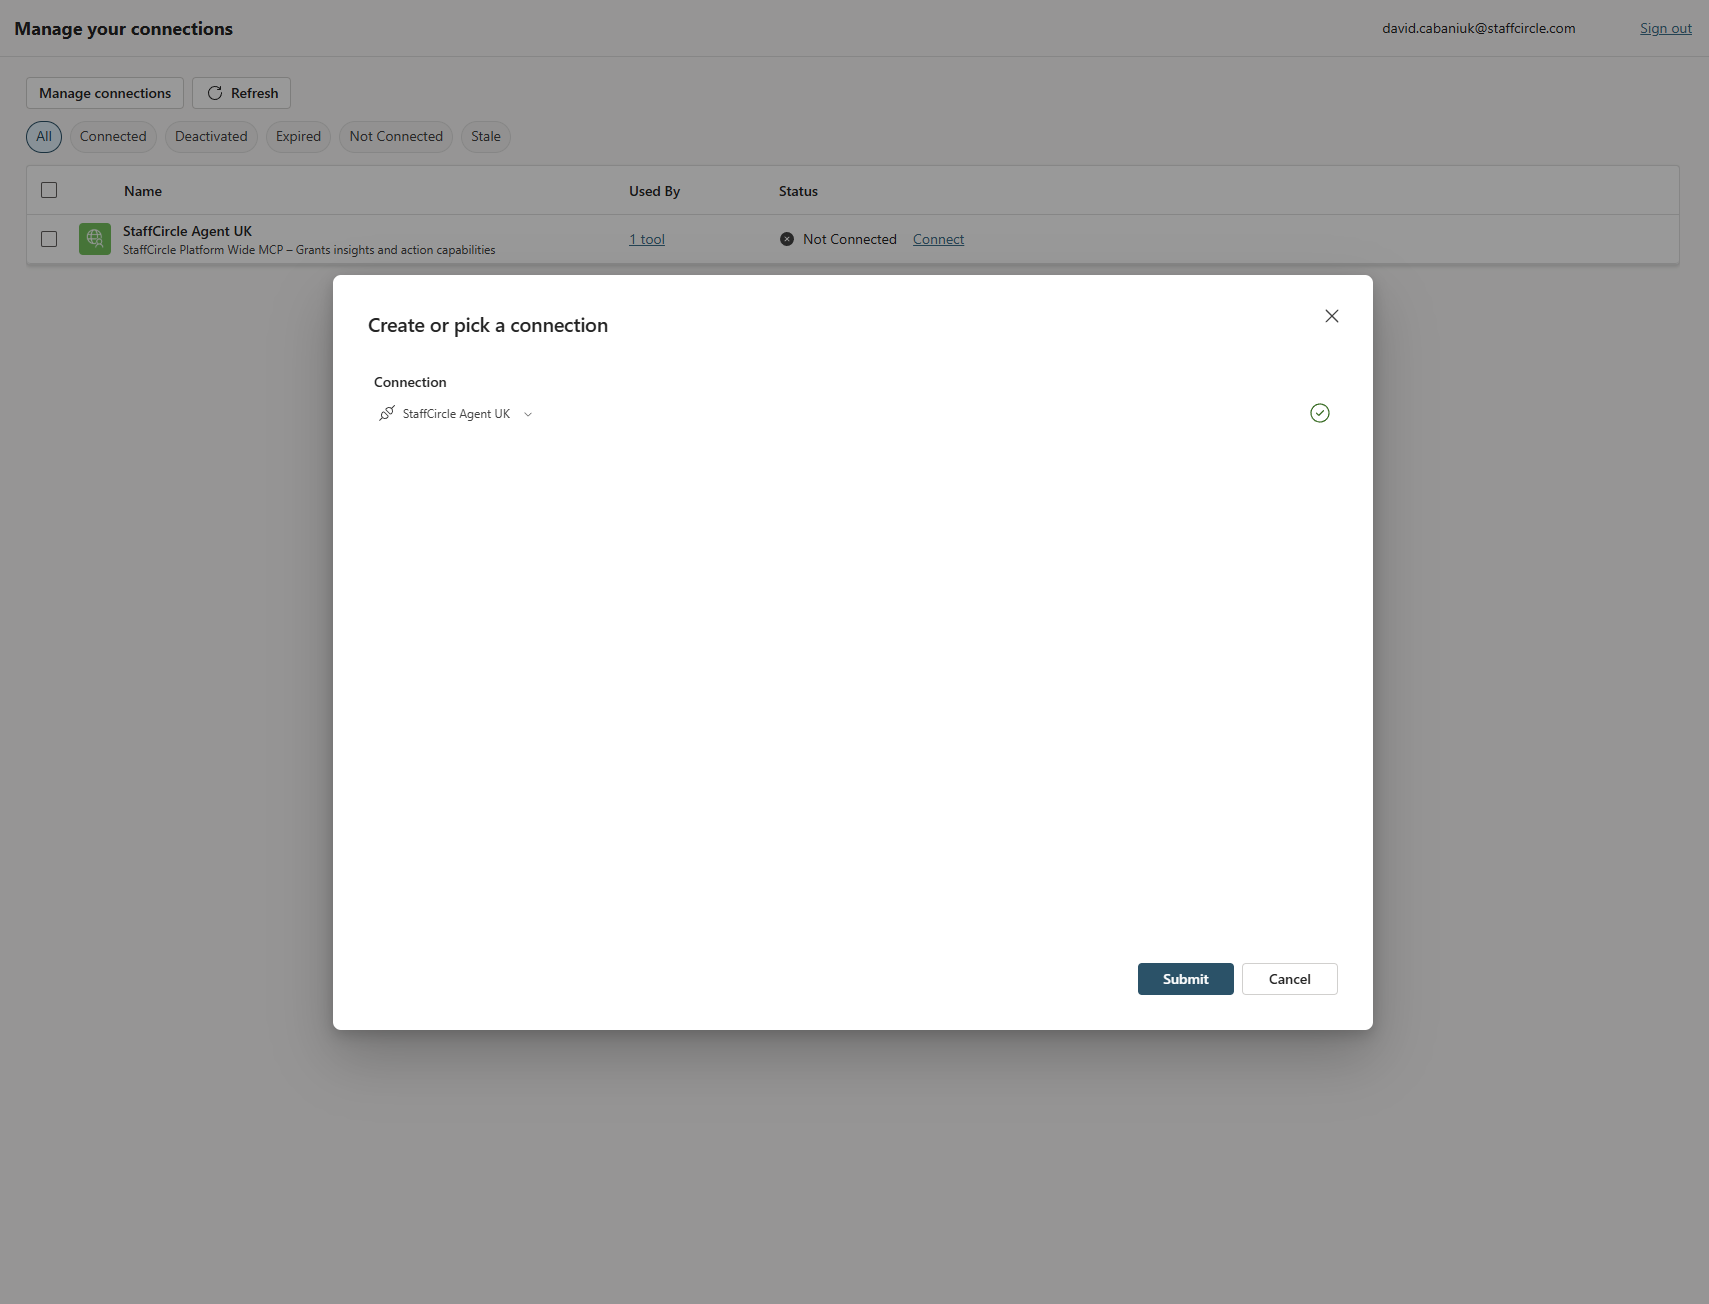
Figure 11 – The Connection Manager page
|
4 |
Complete the OAuth 2.0 sign-in |
|
5 |
Confirm the connection is established |
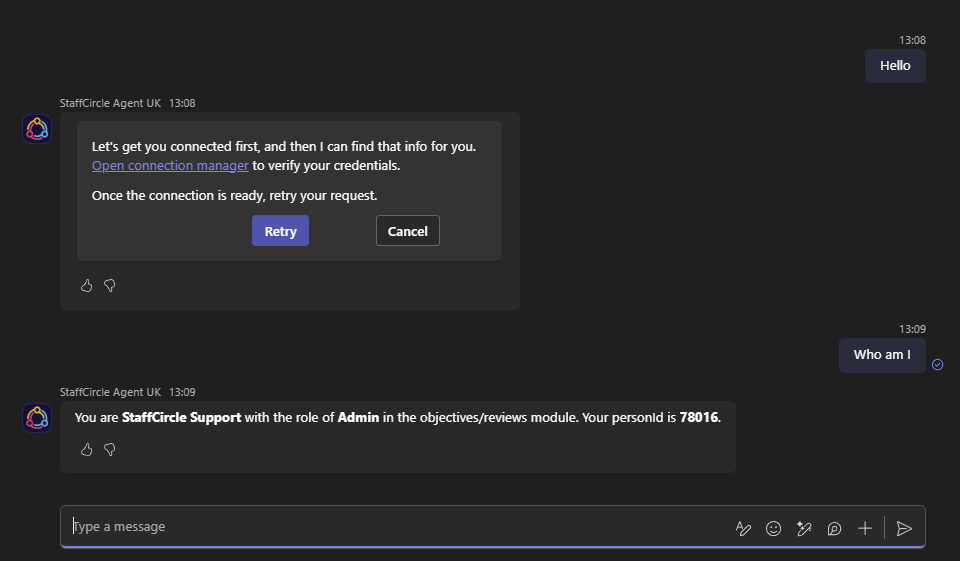
Figure 12 – Connection confirmed; agent responding successfully
|
✅ Setup complete! Your StaffCircle MCP agent is now configured, published, and ready to use in Microsoft Teams. For support, visit www.staffcircle.com or contact your StaffCircle account manager. |
© StaffCircle Ltd • www.staffcircle.com • Document Version 1.2 • May 2026